Want a floor that looks sharp, handles Miami humidity, and works for busy homes? This guide explains how to install vinyl plank flooring with clear prep steps, tool tips, and pro advice that help you avoid gaps, uneven boards, and moisture problems before the first plank clicks into place.
How to Install Vinyl Plank Flooring: Start With the Right Plan
If you are researching how to install vinyl plank flooring, the biggest mistake to avoid is rushing into the first row before checking the room, subfloor, and material. A good vinyl plank flooring installation depends more on prep than speed. In Miami and across South Florida, humidity, concrete slabs, and older homes in areas like Coral Gables, Brickell, and Coconut Grove can all affect how the floor performs over time.
Luxury vinyl plank, often called LVP, is popular because it is durable, water-resistant, and easier to maintain than many natural materials. It also fits a wide range of design styles, from contemporary tropical interiors to Mid-Century Modern condos and Mediterranean Revival homes. If you are planning a larger update, it also pairs well with full home renovation options that improve layout, finishes, and long-term value.
Why homeowners choose LVP in South Florida
Before installing vinyl plank flooring, it helps to understand why it works so well in this region. LVP handles everyday wear better than many traditional wood products, and it offers a practical solution for homes with kids, pets, rental turnover, or heavy foot traffic.
Here are a few reasons Miami homeowners often choose it:
- Better moisture resistance than many hardwood products
- Comfort underfoot compared with tile on concrete slabs
- Wide style range, including oak looks, coastal tones, and modern matte finishes
- Simpler replacement if a plank gets damaged
- Good fit for condos, investment properties, and whole-house updates
For homeowners comparing finish materials across multiple rooms, Newrome also offers dedicated flooring services for professional planning and installation.
Know your vinyl plank type before you begin
Not every product installs the same way. Some planks use a click-lock floating system, while others are glue-down. This guide focuses mostly on floating LVP because it is the most common option for diy vinyl plank flooring projects. If you live in a high-rise or a building with strict sound-control rules, always check condo association requirements before buying material. Some Miami-Dade buildings require specific underlayment ratings.
You should also read the manufacturer instructions for expansion gaps, underlayment rules, and approved subfloors. Those details matter. Skipping them can void a warranty even if the floor looks fine on day one.
Prepare the Room Before Installing Vinyl Plank Flooring
The best answer to how to lay vinyl plank flooring starts with a flat, clean, and dry surface. Vinyl planks can hide minor imperfections, but they will not fix major dips, raised edges, or moisture issues. On many South Florida properties, the subfloor is concrete, and that means moisture testing is essential. Even water-resistant flooring can fail if trapped moisture causes movement, mold, or adhesive problems.
Check the subfloor carefully
Whether you are working over concrete, plywood, or existing tile, the subfloor must be level within the manufacturer’s tolerance. Small low spots can often be corrected with floor patch or self-leveling compound. High spots may need grinding. If you feel bounce, movement, or soft areas in a wood subfloor, fix that structure first.
During a broader remodel, related finish work may also need attention. For example, wall repairs and trim updates often go hand in hand with new floors, especially if baseboards come off during the process. In those cases, homeowners often combine flooring with drywall repair services or finish carpentry.
Acclimation, moisture, and room conditions
Many LVP products need time to acclimate in the room before installation. Follow the manufacturer’s required time and temperature range. In Miami’s tropical climate, do not leave boxes in a hot garage, covered patio, or damp storage area. Bring them into a conditioned interior space.
Moisture barriers are another key detail. On concrete slabs, many products require a vapor barrier even when the planks themselves are waterproof. This is especially important in ground-floor homes, additions, and older properties in flood-prone or humid areas of Miami-Dade.
Tools and materials you will likely need
Before you start, gather the right tools so the job moves smoothly. A simple setup usually includes a tape measure, spacers, utility knife, tapping block, pull bar, straightedge, rubber mallet, and saw for detailed cuts. You may also need underlayment or a moisture barrier depending on the product and subfloor. If your renovation includes adjacent room upgrades, such as a kitchen refresh, it is smart to coordinate flooring height with cabinets and transitions. You can explore kitchen remodeling services if you are planning a larger finish update.
| Prep Item | Why It Matters | Common Miami Concern |
|---|---|---|
| Moisture test | Prevents floor movement and mold issues | Humid air and concrete slabs |
| Level subfloor | Reduces gaps, rocking, and joint stress | Older homes with uneven surfaces |
| Acclimate planks | Helps material adjust before installation | Heat exposure during storage or delivery |
| Leave expansion gap | Allows normal movement | Seasonal indoor humidity changes |
How to Install LVP Flooring Step by Step
Once the room is ready, the actual process of installing vinyl plank flooring becomes much easier. The goal is a straight layout, tight joints, and clean cuts around walls, door jambs, and transitions.
1. Plan the layout
Measure the room width and calculate the width of the last row. If the final row will be too narrow, trim the first row so both sides look balanced. This is one of the most overlooked pro tips in vinyl plank flooring installation. A balanced layout looks better and avoids awkward slivers along the wall.
In open floor plans, choose a starting wall that helps the planks run consistently through the space. Many installers run planks parallel to the longest wall or in the direction of the main natural light source, but room shape and transition points also matter.
2. Undercut door jambs and remove baseboards
For a cleaner result, undercut door casings so the planks slide underneath rather than stopping around them. Remove baseboards carefully if possible, instead of relying only on quarter-round. This creates a more finished look, especially in higher-end homes and design-focused remodels in Pinecrest or Coral Gables.
3. Start the first row straight
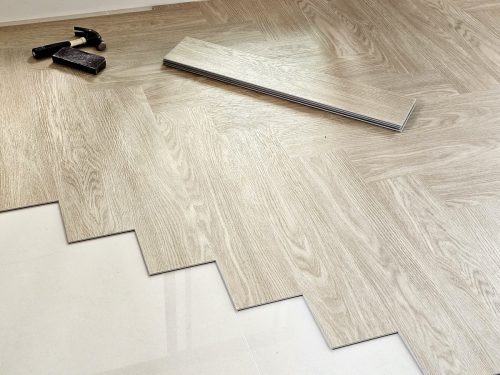
The first row sets the tone for the whole job. Place spacers along the wall to maintain the required expansion gap. Connect the first row carefully and check alignment as you go. If that row drifts, every row after it becomes harder to manage.
4. Stagger end joints correctly
As you continue, stagger the end joints based on the manufacturer’s minimum recommendation. This improves appearance and helps the floor lock together properly. Avoid obvious repeating patterns. Random staggering usually looks more natural, especially with wood-look planks.
5. Cut around obstacles with patience
Vents, closets, kitchen islands, and bathroom doorways often require detailed cuts. Measure twice and dry-fit pieces before locking them in. If you are updating wet areas too, it may be worth reviewing bathroom remodeling services to coordinate waterproofing, transitions, and fixture clearances with the new floor.
6. Finish with transitions and trim
After the final row is installed, add transition strips where required and reinstall baseboards or new trim. Do not pin the floating floor down through the planks with trim fasteners. The floor needs room to move.
Pro Tips That Make DIY Vinyl Plank Flooring Look Better
If you want diy vinyl plank flooring results that look professional, focus on the details most people do not notice until something goes wrong. Keep unopened boxes mixed from different batches to blend color variation. Check each plank before installation for damage or edge defects. Clean as you go so debris does not get trapped in the locking system.
One more practical tip for Miami homes: control indoor conditions before and after installation. If the AC is off during a renovation, temperature and humidity swings can affect material behavior. That is one reason many homeowners choose licensed help for complex projects. To discuss flooring, trim, and whole-home finish coordination, you can request a free consultation with Newrome.
Common Vinyl Plank Flooring Installation Mistakes to Avoid
Even a good product can fail if the install is rushed. If you are learning how to install vinyl plank flooring, these are the problems that most often lead to callbacks, visible gaps, or premature wear in Miami homes.
Ignoring subfloor flatness
One of the biggest issues in vinyl plank flooring installation is assuming the planks will hide an uneven floor. They may cover the look of the surface, but they still telegraph movement underneath. That can cause clicking joints to separate, edges to flex, and boards to feel hollow. On concrete slabs in South Florida, small height changes are common, so take the time to patch and level before moving forward.
Skipping the expansion gap
Floating floors need room to move. If planks are installed too tightly against walls, cabinets, or columns, the floor can bind and lift. This matters even more in Miami-Dade, where indoor humidity can shift during renovations, seasonal weather changes, or AC interruptions. Always keep the manufacturer’s required perimeter gap and make sure trim covers it without pinning the floor in place.
Forcing damaged or misaligned joints
If a plank does not lock easily, stop and inspect it. Forcing a connection can break the tongue or groove and weaken the row. Clean debris from the joint, confirm the angle, and try again. During larger finish updates, many homeowners also refresh trim and wall color after flooring is complete. If that is part of your plan, it helps to coordinate with professional painting services so baseboards, touch-ups, and final detailing line up with the new floor.
Using the wrong transition details
Transitions are not just cosmetic. They help manage height changes, define doorways, and allow proper movement between rooms. This is especially important where LVP meets tile, stairs, or exterior doors. In older homes around Coral Gables or Coconut Grove, those transition points are rarely perfectly square, so careful measuring makes a big difference.
How to Lay Vinyl Plank Flooring in Kitchens, Bathrooms, and High-Traffic Areas
Not every room has the same demands. A big part of installing vinyl plank flooring successfully is adjusting your approach based on moisture, traffic, and how the space is used every day.
Kitchens
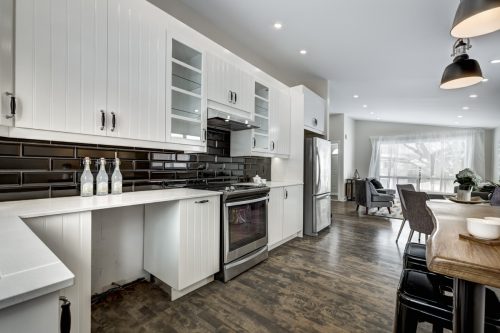
Kitchens are one of the best places for LVP because spills are common and foot traffic is constant. If you are deciding how to lay vinyl plank flooring in a kitchen, plan appliance clearances, island edges, and transitions to adjacent rooms before you start. Many installers prefer to remove appliances first for cleaner cuts and better access. You should also confirm whether cabinets are already installed, since many floating products should not be trapped under heavy fixed cabinetry unless the manufacturer allows it.
If flooring is part of a broader update, Newrome can help homeowners coordinate layout, finishes, and sequencing through kitchen remodeling services that keep flooring heights and transitions consistent.
Bathrooms and laundry areas
LVP is water-resistant, but that does not mean every bathroom detail can be ignored. Toilets, vanities, tubs, and shower entries all require clean edges and proper sealing where recommended by the manufacturer. In humid South Florida homes, bathroom exhaust and moisture control still matter. Standing water left at seams or around the toilet flange can create problems over time.
For bathrooms, keep these practical points in mind:
- Use the correct transition or edge profile at shower thresholds and doorways
- Check toilet flange height before reinstalling the toilet over the new floor
- Seal vulnerable perimeter areas only where the manufacturer recommends it
- Do not assume waterproof planks eliminate the need for proper bathroom ventilation
If your bathroom needs more than a flooring swap, you can also explore bathroom remodeling services for waterproofing, fixture updates, and finish coordination.
Condos, rentals, and busy family homes
For Brickell condos, Miami Beach apartments, and investment properties across South Florida, durability and speed matter. LVP is popular because single planks can often be replaced without redoing the whole room, depending on the locking system and layout. In condos, always review building rules for underlayment, sound ratings, work hours, and elevator reservations before materials arrive. Those practical details can affect the installation schedule just as much as the flooring itself.
Pro Finishing Details for a Better DIY Vinyl Plank Flooring Result
The difference between an average install and a polished one usually comes down to finish details. That is true whether you are doing diy vinyl plank flooring in one bedroom or updating an entire Miami home.
Trim, doors, and visual flow
After the planks are down, look closely at the room edges. Reinstalling straight baseboards, adjusting door clearances, and using clean transition strips will make the floor feel intentional. In homes with older trim profiles or custom millwork, those finishing touches matter even more. If your project includes casing replacements, jamb adjustments, or new baseboards, it may help to coordinate with finish carpentry services for a cleaner final result.
Check the floor before calling it done
Before moving furniture back, walk the entire space slowly. Look for soft spots, open joints, chipped corners, or trim that presses too tightly against the floor. Open and close doors. Check transitions at every threshold. A short inspection now is much easier than repairing a problem after the room is fully set up.
This quick checklist helps catch common issues:
- Confirm all spacers have been removed
- Inspect perimeter gaps before baseboards go back on
- Check transitions for secure fit and smooth height changes
- Make sure no fasteners went through the floating planks
- Clean the surface with a manufacturer-approved product
Know when professional help makes sense
Some rooms are simple rectangles. Others involve uneven slabs, multiple transitions, built-ins, or moisture concerns that make the job much harder. If you are unsure how to install lvp flooring over an older concrete floor, around custom kitchen layouts, or through a full first-floor renovation, professional planning can save time and protect the material warranty.
| Situation | DIY May Work | Professional Help Is Smarter |
|---|---|---|
| Simple bedroom or office | Flat subfloor, few cuts, standard trim | Rarely needed unless moisture is present |
| Kitchen or bathroom | Possible with careful planning | Better for complex fixtures and transitions |
| Whole-home install | Challenging for most homeowners | Best for layout consistency and speed |
| Older Miami home on slab | Only if floor is dry and level | Recommended for moisture and leveling issues |
Final Thoughts on How to Install Vinyl Plank Flooring
If you want the best results from vinyl plank flooring installation, focus on the steps that happen before and after the planks click together. A dry, level subfloor, a straight first row, proper expansion gaps, and careful finishing details are what make the floor last. That is the real answer to how to install vinyl plank flooring in a way that looks good and performs well in Miami’s humid climate.
For some homeowners, diy vinyl plank flooring is a smart weekend project. For others, especially in larger homes, condos, or design-focused remodels in Coral Gables, Pinecrest, or Brickell, it makes sense to bring in experienced help. If you want guidance on materials, subfloor prep, or a complete flooring update, explore Newrome’s flooring installation services or view completed projects for inspiration. When you are ready to move forward, request a free consultation with Newrome for licensed, insured craftsmanship tailored to your home.